Blog
Flat Bed Knitting Machine Installation Guide: Step-by-Step
By Ramana Machines · September 15, 2026
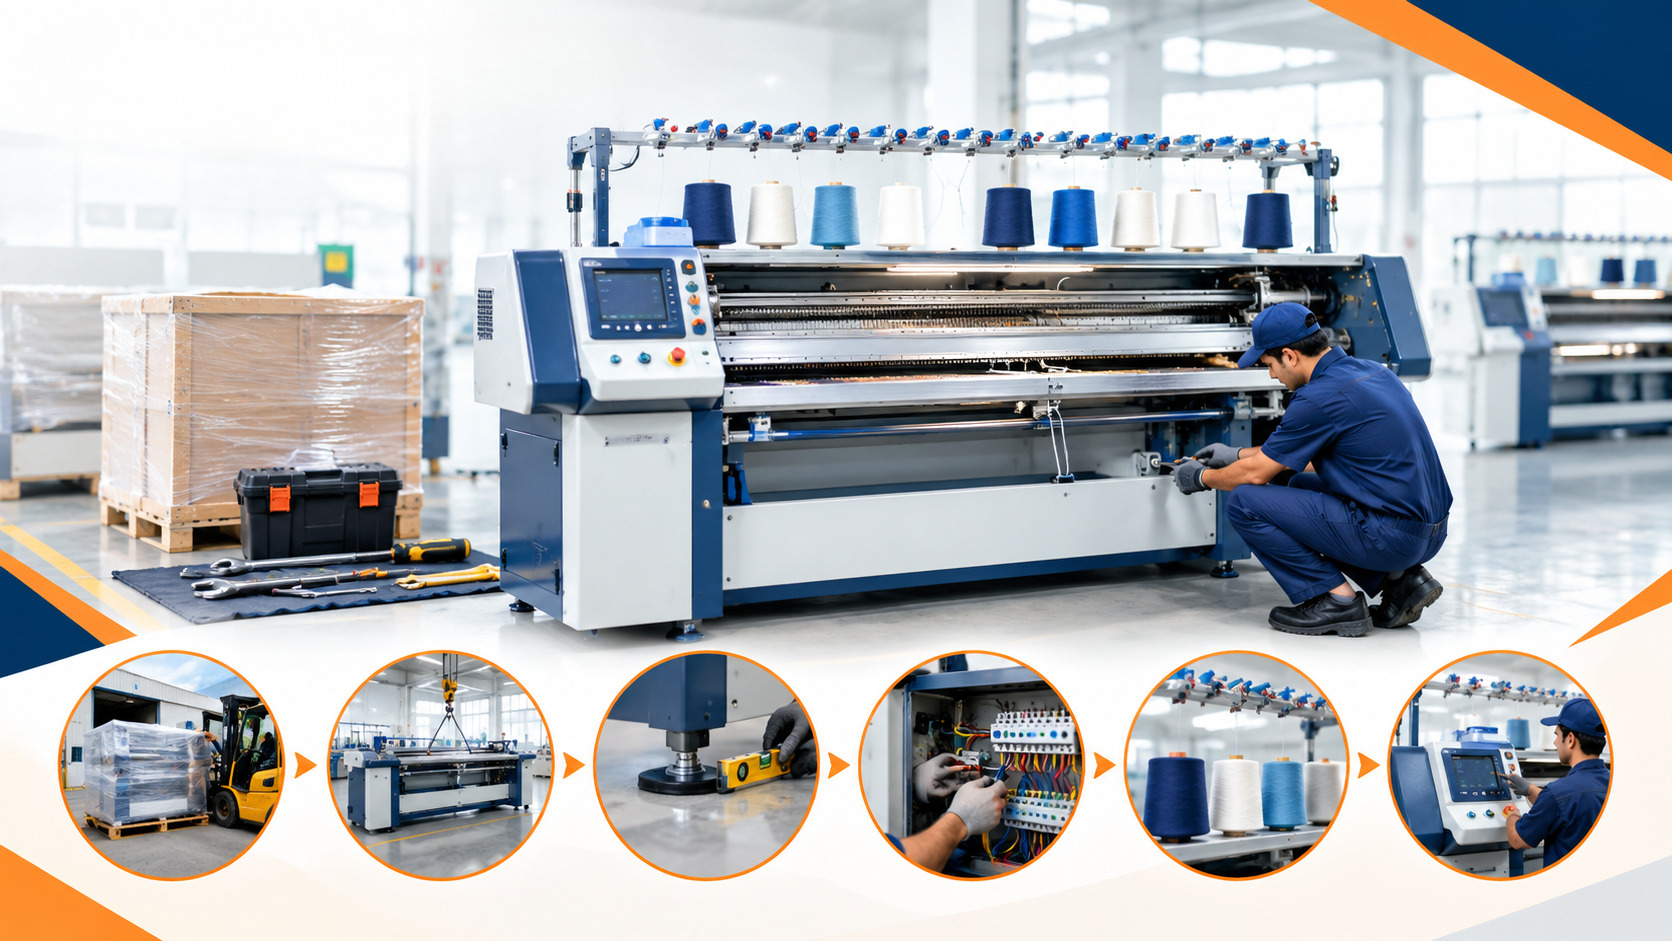
Learn how to install a flat bed knitting machine with steps for positioning, leveling, electrical connection, yarn setup, and initial testing.
Proper installation is an important part of getting a knitting machine ready for production. Even a good-quality machine may not perform correctly if it is placed on an unsuitable floor, incorrectly leveled, or connected without following the required specifications.
A careful installation helps reduce vibration, improve machine stability, and support consistent knitting performance. This guide explains the main steps to consider when installing a flat bed knitting machine.
1. Prepare the Installation Area
Before the machine arrives, prepare a clean and suitable installation area. The floor should be strong enough to support the machine and should provide a stable working surface.
Make sure there is enough space around the machine for:
- Operator movement
- Yarn handling
- Maintenance work
- Electrical access
- Machine inspection
- Loading and unloading components
Keep the installation area clean and free from unnecessary materials. Excessive dust, moisture, or poor ventilation can affect machine operation and maintenance.
The room should also have suitable lighting so operators can clearly see the needle bed, yarn path, carriage, and other working components.
2. Position the Machine Correctly
Once the machine is moved into the production area, position it according to the installation instructions provided for the specific model.
Avoid placing the machine too close to walls or other equipment. Operators and technicians should have sufficient access to the sides and rear of the machine when maintenance is required.
During positioning, check that:
- The machine has adequate working clearance.
- The machine is placed on a stable floor.
- The needle bed is protected from impact.
- The machine is positioned according to the recommended layout.
- Access to electrical connections is not blocked.
Heavy machines should be moved using appropriate handling equipment and proper safety procedures.
3. Level the Machine
Correct leveling is an important installation step. An uneven machine position can contribute to unwanted vibration and may affect smooth operation.
Use suitable leveling equipment to check the machine position. Adjust the leveling points according to the machine manufacturer's installation instructions.
After adjustment, check the machine again to confirm that it remains stable and properly positioned.
Do not try to correct major floor problems only by adjusting the machine. If the floor itself is unsuitable, it should be addressed before installation.
4. Complete the Electrical Connection
Electrical connections should be completed according to the machine's rated requirements and installation instructions.
Before connecting the machine, check:
- Required voltage and frequency
- Power supply capacity
- Proper grounding
- Electrical protection
- Cable condition
- Control panel connections
Electrical work should be carried out by a qualified technician. Do not switch on a newly installed machine until the electrical connections and safety systems have been checked.
For a computerized flat bed knitting machine, the electrical and control system should also be inspected carefully before the first operation.
5. Check the Yarn System
After the main machine installation is complete, inspect the yarn feeding system before starting production.
Check the yarn path from the yarn supply through the guides and feeder. Make sure the yarn can move smoothly without unnecessary resistance or contact with surrounding components.
Before production, check:
- Yarn feeder position
- Yarn guides
- Yarn path
- Yarn tension
- Yarn supply
- Needle and carriage movement
The yarn should be suitable for the machine and the product being produced. Incorrect yarn setup can result in breakage, uneven stitches, or poor fabric quality.
6. Perform the Initial Setup
Once the machine is installed, leveled, connected, and checked, carry out the initial setup according to the machine's operating instructions.
This may include checking:
- Needle movement
- Carriage movement
- Yarn feeding
- Stitch settings
- Machine controls
- Safety functions
- Lubrication points
- Basic operating parameters
Start with a suitable test program or sample rather than immediately beginning full-scale production. This allows the operator to identify installation or setup issues before regular production begins.
Operators should also receive proper training on machine operation, basic adjustments, cleaning, and safety procedures.
Installation Checklist
Before starting regular production, confirm the following:
Installation Check | Status |
| Installation area prepared | ✓ |
| Machine correctly positioned | ✓ |
| Machine properly leveled | ✓ |
| Electrical connection checked | ✓ |
| Grounding verified | ✓ |
| Yarn system inspected | ✓ |
| Needles and carriage checked | ✓ |
| Basic settings configured | ✓ |
| Safety functions checked | ✓ |
| Test knitting completed | ✓ |
| Operator training completed | ✓ |
When Should You Get Professional Installation Support?
Professional installation support can be useful when installing a new machine, changing production locations, or introducing a machine with more advanced control systems.
A reliable textile machinery supplier should be able to provide guidance on machine positioning, installation requirements, initial setup, operator training, and technical support. Following the correct installation procedure from the beginning can help prevent avoidable operating problems later.
Get Installation Support from Ramana Machines
Ramana Machines supports customers with the sourcing and supply of suitable textile machinery and provides assistance with installation, initial machine setup, operator training, spare parts, and after-sales technical support. If you are planning to install a new flat knitting machine, our team can help you with the process from machine selection and sourcing through installation and technical assistance.